Saturday, February 8, 2014

New Videos Available at the Design-based Research YouTube Channel

With the help of my graduate students, I have finished editing and annotating a series of videos by Design-based Researchers about Design-based Research (DBR). The full set of videos can be accessed at the Design-based Research YouTube Channel.

These videos were created at the Design-based Research at the Crossroads conference in Athens, GA from Sept. 24-26, 2013. 

Each researcher was asked three questions:

1.) What are you doing currently with design-based research
2.) Where is DBR currently, and where do we go from here, and
3.) What advice do you have for burgeoning design-based researchers.

Some very interesting perspectives from seasoned DBR researchers, as well as burgeoning scholars.

Here is a list of scholars interviewed:
  • Matthew Schmidt (University of Hawaii)
  • James Laffey (University of Missouri)
  • Rick West (Brigham Young University)
  • Tom Reeves (University of Georgia)
  • Andy Gibbons (Brigham Young University)
  • TJ Kopcha (University of Georgia)
  • David Wiley (Brigham Young University)
  • Chandra Orrill (University of Massachusetts at Dartmouth)
And the videos:

Matthew Schmidt on the Current State and Future of Design-based Research (2013) 


James Laffey on the Current State and Future of Design-based Research (2013)


Rick West on the Current State and Future of Design-based Research (2013) 


Tom Reeves and Andy Gibbons on the Current State and Future of Design-based Research (2013) 


TJ Kopcha on the Current State and Future of Design-based Research (2013) 


David Wiley on the Current State and Future of Design-based Research (2013)


Chandra Orrill on the Current State and Future of Design-based Research (2013)


Wednesday, February 5, 2014

Cool things happening in the virtual worlds arena

First, a quick blog post from Microsoft's Project Spark, which isn't Open Source by any means, but gives a glimpse into next generation authoring tools for 3D environments (with a strong focus on gaming). That it will purportedly offer seamless compatibility between Windows and Xbox is a boon. Currently still in beta. See more here.

Next, there is the news from Meshmoon/RealXTend that their WebRocket native browser virtual world interface has reached 1.0 status. This is a Big Deal for folks who are still keeping the dream of the "3D Web" alive, since WebRocket allows for access to fully functional virtual worlds without requiring any plugins, apps, installations, or other headaches. Currently Chrome and Firefox support only, but aren't those the only browsers that matter?

Obligatory eye candy:

Microsoft's Project Spark 

Meshmoon 1.0

Friday, November 22, 2013

New website complete!

After spending a lot of time learning the Google Apps suite well enough that I can integrate all of the different tools, I'm proud to say that I've completed my professional portfolio website.

I also updated the look and feel of the blog to match the design of the site.

Really happy with how this turned out!


Friday, August 23, 2013

Eye Tracking in Second Life using Mirametrix S2

I picked up a Mirametrix S2 eye tracking device over the summer and am just getting a chance to try it out.

I took it for a spin on the University of Hawaii's Educational Technology Second Life island.

Here's a video of the fixations and saccades:


And here's a video with heatmaps (I also reduced the size of the recording area, which made for better quality video output).


Monday, July 1, 2013

Holodeck article in this month's Virtual Education Journal

The RELATE consortium at the University of Hawaii (Research and development on Emerging Libre Applications of Technology for Education) has an article about the Holodeck mixed reality teaching and learning environment in this month's issue of the Virtual Education Journal.

Check out the journal at this link, and if you're interested, read the Holodeck article starting on pp. 77.

Wednesday, June 19, 2013

Open Source Eye Tracking: Lessons Learned (So Far)

I've made some progress. Since I'm short on time, I'll just summarize.

First Steps
I began with the intention of building an Eye Writer 2. While the Eye Writer 2 does appear to work reasonably well as a remote tracker (provided a chin rest is used), the solution seemed to be primarily geared towards the Eye Writer software and is very Macintosh-centric. It appears that it may be used on other systems.

Course Correction
I abandoned the idea of building an Eye Writer 2 because I want to use Ogama and ITU Gaze Tracker to do some eye tracking research (for a multi-user virtual environment we are building). It was not clear that the Eye Writer 2 would interface well with ITU GT.

Prototype 1 Build
I attempted to build a remote eye tracking setup using a hacked Sony PS Eye camera with a 12mm lens and 2 external IR LED arrays, as outlined elsewhere. While I was able to get the tracking hardware working, calibration was hit-and-miss. Binocular was less accurate than monocular.

Prototype 2 Build
I then acquired the cheapest USB webcam I could find. I removed everything from the PCB, replaced the LEDs with 2 IR LEDs, installed a visible light filter and installed a 6mm lens. I then attached it to a pair of sunglasses from which I removed the lenses. While I didn't follow these instructions to the letter, this pretty much sums up what I did. Good information can also be found here (and the full article here)

The second prototype provided greater accuracy, but the junky webcam I used has a low frame rate and the optics are noticeably inferior to those of the PS Eye. I blogged about my initial results previously.

Lessons Learned (So Far)
The first lesson is that the devil is in the details. While you can build a cheap eye tracking system on the cheap, investing in quality gear will make a difference. Spend your money on your webcam and get some decent lenses (Peau Productions has great stuff!). Everything else can be hacked together, but optics and framerate are critical to accuracy.

The second lesson is that remote tracking with webcams is hit-and-miss, very finicky, and frankly too brittle to be useful for serious research. Head-mounted eye tracking with webcams, on the other hand, can be very accurate (see this article for an in-depth analysis). Unless you can afford the ThorLabs cam, plan on head-mounted and save yourself time and hassle.

The third lesson is that head-mounted has its own set of challenges. The camera likes to shake. Head movements (even very slight) disrupt accuracy and throw off calibration. Finding the proper distance to sit from the monitor in order to get good tracking results is a challenge. Do bigger displays make a difference? What about projected displays? I'm investigating this.

Recommendations and Next Steps
Most of the discussions in this forum focus on head-mounted or remote setups. Both of these designs have their strengths and weaknesses. My recommendation is a hybrid setup for cheap webcams (not recommended for ThorLabs cam). In order to maintain low cost while achieving high accuracy, I propose attaching the webcam to a chin rest. This way, the webcam is not attached to the user's head, reducing shaking and movements and increasing comfort. In addition, the user's head is kept still, helping to increase accuracy. An illustration is provided below.


Next steps will be to build a DIY chin rest and attach the PS Eye camera to it. I will also add IR LEDs close to or on the PS Eye camera as opposed to using an external IR LED array. Stay tuned.

Saturday, June 8, 2013

Open Source Eye Tracking - Initial Results

I've been working on building an Open Source eye tracking system since I worked on my first eye tracking study back in 2008. I'll discuss my experiences in a series of blog posts to follow. Today's post is all about results.

I've put together a cheap eye tracking system using a 10 dollar web camera, Ogama, and ITU Gaze Tracker. At the moment, the tracking hardware is a total hack and held together with duct tape, zip ties, and solder. After putting the apparatus together this morning, I did some initial tests. Given the very early prototype nature of the hardware, the calibration is a bit off. But the results are impressive, regardless.

Video showing saccades and fixations


Video showing spotlight highlighting


 Image with saccades and fixations

Heatmap overlay - here it is very obvious that the calibration is skewed to the left

Friday, June 7, 2013

Introduction to Free and Open Source Software in Education - Free Open Educational Resource

I'm releasing my first Open Educational Resource today.

Introduction to Free and Open Source Software in Education

This is a two-week unit focused on the practical application of Free and Open Source software (F/OSS) in education. It is suitable for advanced undergraduate learners in K-12 teacher training programs. The unit is not intended to be an exhaustive review of F/OSS. Rather, the unit assumes no prior knowledge of F/OSS and is intended to act as an introduction and a guided exploration.

Upon completion of this unit, learners will be able to:

  1. Describe F/OSS in their own words
  2. Provide examples of how F/OSS can benefit education
  3. Provide examples of F/OSS tools
  4. Explain some of the barriers to F/OSS adoption
  5. Describe how instructors might start using F/OSS

I've released the unit under a Creative Commons Attribution-ShareAlike 2.5 Generic License (CC BY-SA 2.5).

What prompted me to release this unit is twofold. On the one hand, I've decided to eat my own dog food. If I'm constantly advocating for open educational resources and the use of F/OSS in education, then I need to practice what I preach. On the other hand, as I was developing the two modules in this unit, I was disappointed at the paucity of resources that were readily available for introducing F/OSS for education to learners with little to no prior knowledge in this area.

Actually, there is also a third reason. I would hope that by releasing under a CC BY-SA license, if anyone does use these resources and makes improvements on them, the changes will be returned to me so that the community can benefit.

Thursday, June 6, 2013

Edupunk's not dead

Time to dust off the old blog and do some spring cleaning. First things first - the blog needed a new name.

I haven't touched this blog in five years. Not because I didn't have anything to say. Just because I've been saying it elsewhere. In that time, I've finished my dissertation, completed a post-doctoral fellowship, and taken a position as an assistant professor at the University of Hawaii. Wrote some papers along the way (mandatory curriculum vitae).

I work in educational technology and special education. I'm an open source kind of guy. I hack hardware and software to build cool solutions to educational problems. I identify as an edupunk. There is plenty written on this topic, but a good place to start is at the Center for Edupunx.

I've been doing some cool things in the educational technology world that other educators might find to be of value. I've decided to change the focus of this blog from only focusing on open source virtual worlds to all of the various hacks and projects I'm working on. I'll be posting as I find time.

Monday, November 3, 2008

iSocial Guest Blog at the Wonderblog


On behalf of the iSocial project team, I was approached to write a guest blog entry for Project Wonderland's Wonderblog. The team at Sun Microsystems recently published the iSocial entry.

You can read it by clicking the following link:

Wonderblog

Tuesday, September 23, 2008

iSocial Prototype Walkthrough

I took a few minutes today to put together a brief introductory video of our prototype iSocial learning environment. We will be conducting trials with this learning environment beginning this Friday. This represents three months of hard work, and we're proud of what we have to show!


Monday, June 23, 2008

Wonderland's World Builder

How did I go from this


to this?


With the Wonderland World Builder of course.

The world builder is a simple browser-based application that makes it possible to create Wonderland worlds. Using a simple drag-and-drop interface, one simply drags tiles onto a 2D grid and positions them. After saving the world, it can be easily accessed from the Wonderland client.

The software itself comes with a set of very functional tiles. It is also possible to create tiles using Blender and the Gimp.

The world builder has been discussed at the Wonderblog.

It would be disingenuous to say that it was easy to set everything up on my development machine. However, the Wonderland Community is refreshingly fast at providing solutions when one gets stuck.

Wednesday, June 18, 2008

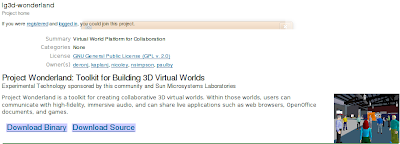
Initial Forays into Sun's Wonderland


Due to a number of technical problems that our team has experienced with the Cobalt build of OpenCroquet, it became apparent to us that it may be in our best interests to investigate an alternative software platform for building the iSocial prototype. Although Cobalt would appear to have a more elegant design, we are unfortunately bound by time constraints, limited manpower and deadlines. Cobalt just isn't mature enough at this point for us to continue building on top of it. Sigh.

We have to consider that our project will be used to teach individuals with Autism social skills. A buggy platform that is overly prone to crashing is not facilitative of this goal - especially with our user population.

The only alternative was obvious - Sun's Wonderland.

I began to look into it last week. I began working with it and setting up a development environment this week. I have to admit that I am impressed. Extremely impressed. I was able to get the client and server software running on multiple platforms (WinXP and Ubuntu 8.04) in no time at all. I was able to install and configure a development environment on Ubuntu in an evening and completely build the source myself by midnight.

The developer community appears to be bigger and more active than with the Cobalt/Croquet project. My questions got answered sometimes in a matter of minutes, sometimes in a few hours. But it never took months like some issues I've posted to the Cobalt/Croquet mailing list. And, gasp, Wonderland actually has forums. It's incomprehensible to me that Cobalt/Croquet still relies on a mailing list.

So after building the source from the latest code contributions that I pulled from CVS, I took the software for a spin and was extremely pleased with what I found. Here's a video:

Tuesday, June 3, 2008

Update: iSocial Funded!


I haven't posted in quite a while - basically since the Cobalt build was released.

I just wanted to assure everyone that I am indeed very much alive and still working with Croquet/Cobalt. I've just been very busy writing my dissertation proposal (which I defended May 9 and have had accepted - hooray!) and ramping up for full-on development of the iSocial project.

The major news is that iSocial has received a small amount of start-up funds to design and develop a functional prototype. This week is the first week of me working in my official position as project manager for this endeavor. First steps are to create a "generic" Cobalt world that supports all of the functional requirements of the iSocial system and to build a visual design that supports the social skills curriculum we are using. This is an exciting time for us, as things are finally starting to move forward.

We are 100% committed to Open Source. Although our project may not be able to contribute code to the project, we will contribute experience and provide assistance. Our developer will be helping out on the IRC channel, and I'll be putting together the occasional how-to. We are looking in to donating our models and avatars to the project. Stay tuned, as more details are certain to follow.

Friday, March 7, 2008

Two Croquet-Specific Blender Tutorials


Croqueteer Waufrepi has created two tutorials to complement the DMU guides. These are focused on Blender, but are specific to Croquet and will show you how to set up your Croquet exporter in Blender and how to export a Blender 3D model in a format that is compatible with Croquet. Cool!

http://www.youtube.com/user/waufrepi

Tuesday, March 4, 2008

Cobalt released!


For those of you who have been drooling over this release, it is finally available for download. Be aware that this is a very early build, so you can expect some buggy-funkyness.

Information on Cobalt can be found here: http://www.opencroquet.org/index.php/Cobalt

A direct link to the image is here: http://croquet-src-01.oit.duke.edu/cobalt-base-current-build.zip

For the purists, the Monticello repository is here: http://croquet-src-01.oit.duke.edu:8886/

And the bug tracker (you'll need it!): http://croquet-src-01.oit.duke.edu/mantis/login_page.php

Monday, March 3, 2008

Tutorial for Building a Simple Croquet World, Part 1: Setting Up a Croquet World


I am working on putting together a tutorial on how to build your own Croquet world. The entire tutorial will consist of 1.) setting up a Croquet world 2.) customizing a Croquet world and 3.) connecting to other Croquet worlds.

I have finished the first installment of the tutorial series, which will instruct you on how to set up your own Croquet world. Because of the volume of the tutorial, it made sense to make it available as a PDF.

You can download the PDF here.

As always, your feedback and suggestions for improvement are welcome and encouraged.

Wednesday, January 23, 2008

How To Set Up VNC in a Croquet World

Introduction

I have witnessed quite a few folks asking how they can get VNC running within a Croquet world. Thanks to the excellent KCroquetParticipant subclass, getting VNC up and running within a Croquet world is a fairly easy task. However, to date, nobody has provided a reasonable explanation for non-technical users to perform this task. This tutorial will instruct you on how to do just this.

An explanation of what VNC is and why it is useful is beyond the scope of this tutorial. For more information on VNC, a good starting point is at the Wikipedia entry for VNC.

Learning Outcomes

Upon completion of this tutorial, you will be able to run a VNC server on a host computer, and connect to that VNC server from within a Croquet world.

Prerequisites

In order to complete this tutorial, you will need the following software:

1. REQUIRED: A VNC server. Below are some options that are free of cost:
2. REQUIRED: A second computer on which to run the VNC server. Although it is possible to run a VNC server and client on the same machine, the technical details involved in such a task are beyond the scope of this tutorial.

3. RECOMMENDED: The latest build of the Croquet SDK, available here.

Step by Step Guide

Mac OS X was used to create this tutorial. Much of the information herein should be readily transferable to other operating environments; however, your results may vary.

Part 1: Steps for VNC server computer

1. Open your VNC server software and configure it (in this case, we are using Vine Server).
The important values to note are:
  • IP Address
  • Display Number
  • Port
  • Password
Write these values down so that you can reference them later.
Note the values outlined in red, as
you will need them when you are
configuring the VNC client in Croquet.


2. Start the VNC server software

Select "Start Server" in Vine Server's connection
dialogue to start the server

You should be provided with some system feedback indicating that the server is running.

The Server Running message indicates that the VNC server
is indeed running.

The VNC server computer is now hosting a VNC session. We will connect to this VNC session from within Croquet in the next section.

Part 2: Steps for Croquet Computer

1. Launch Croquet and open the KAT Demo (this is the KCroquetParticipant subclass)

Locate the KAT Demo in the Objects browser.

Drag the KAT Demo icon from the Objects browser into the Squeak
project space (click image to enlarge).


You are presented with the above dialogue. Select "Cancel."

After a few moments of loading, you are presented with
the above Croquet world (click to enlarge).


2. Configure and start VNC from within the Croquet world.

2.1 From the menu, select "Admin-->New raw RFB"


2.2. Enter the IP address of your VNC server, followed by a colon, followed by the port number that the VNC server is running on. Then select "OK.
"
The structure of the VNC server's address should be the server's IP, followed by the server port.

2.3. Enter the VNC display number; then select "OK."


2.4. Enter the password; then select "OK."


2.5. You should be presented with a Croquet window showing the desktop of the computer on which you are running a VNC server.


You may want to spend some time playing with Croquet's VNC implementation, as it does have some quirks.

Congratulations! You've gotten VNC to work in a Croquet world.

Demo

Here is a video demonstrating VNC being used in a Croquet world.


Summary


In this tutorial, you learned how to start and configure a VNC server on one computer, and how to access that VNC server from within a Croquet world that is running on a separate computer.

Tuesday, January 22, 2008

New Croquet Builds Available

In case you haven't been following the developers' list-serv, Mark McCahill has put together a current build of the Croquet SDK.

Here's his post:
I added a link on this page

http://croquetproject.org/index.php/Downloads

to a current build of the SDK - I think we are at the point where
enough people
want to kick the tires without going through the patch experience
that it makes sense
to maintain a current build, so I'll do that going forward.

Everyone is still more than welcome to apply the changesets
themselves, of course ;-)
In addition to the new(er) build of Croquet, there are some interesting older builds there. Check out the Secondary Software Package Distributions section, where it looks like there is a Brie demo (w00t).

Monday, November 5, 2007

Croquet Crashing When Connecting to Other Worlds? Here's a Fix.

Tim Wang has posted a how-to for updating your Croquet image and fixing a bug that can cause a crash when connecting to other worlds. Thanks Tim!